Page 1 of 2 12 LastLast
Results 1 to 10 of 13

Thread: C&R HE Install

  1. #1
    Birthday Boy Gr8snkbite's Avatar
    Join Date
    Apr 2010
    Posts
    18,694
    Thanks Thanks Given 
    0
    Thanks Thanks Received 
    0
    Thanked in
    0 Posts

    C&R HE Install

    Sorry for the delay..i know you all are anxious to see. So wait no further. First off, i must give Van and his crew at Revan Racing a big Kudo's. C&R also. This is some serious hardware and well worth every penny.

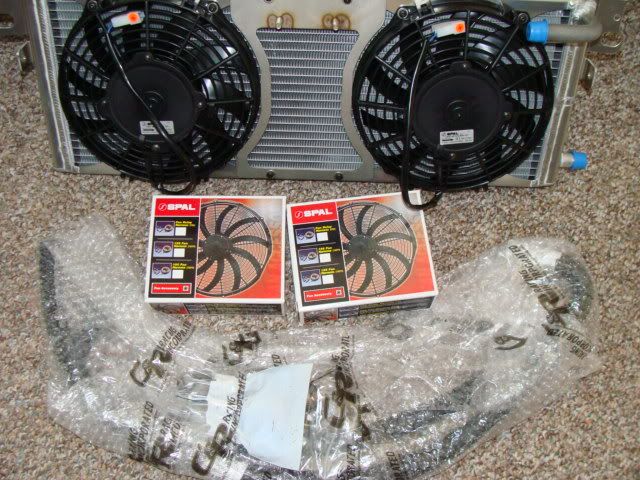
    So...the parts..as you well know.


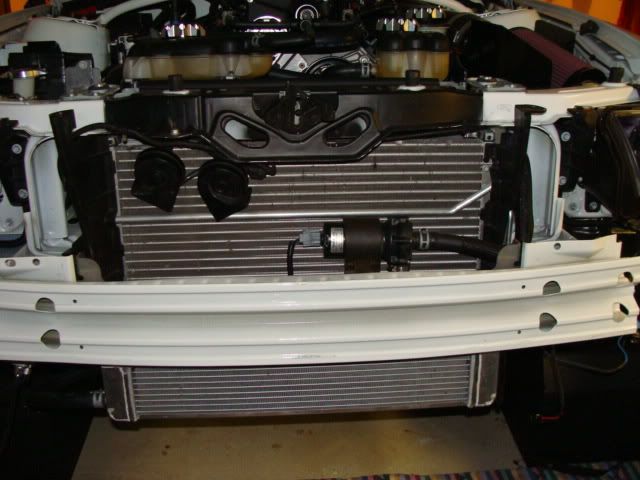
    I had already removed the old unit and made ready. CH53 came over to assist..rather be the gopher....:mafiasmile:

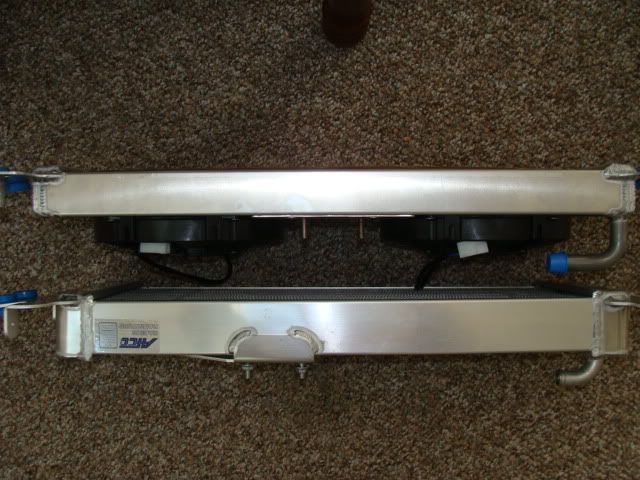
    Side by side of new and old...


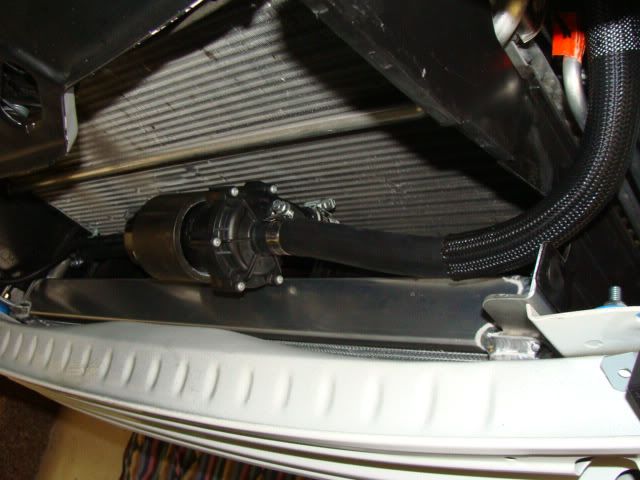
    Mounted the pump bracket..Needed to add washers (not in the kit) to ensure a clean uniform and even fit. Otherwise the bracket would sit cockeyed


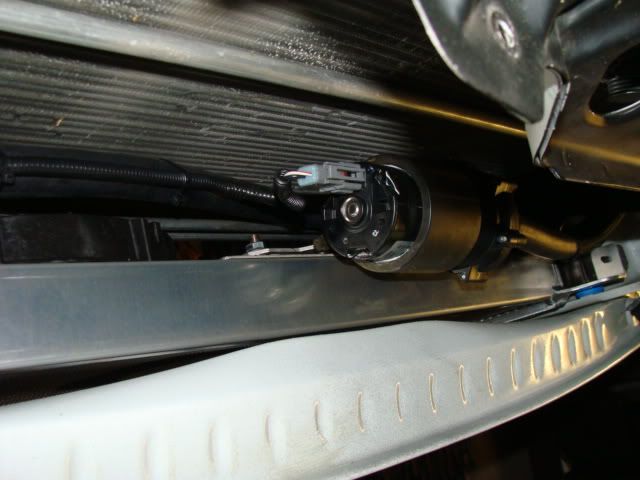
    Then installed the pump. Rotating the pump in the rubber mount was a PITA, so i removed it, greased the inside and reinserted the pump at a slight angle to clear the fan.


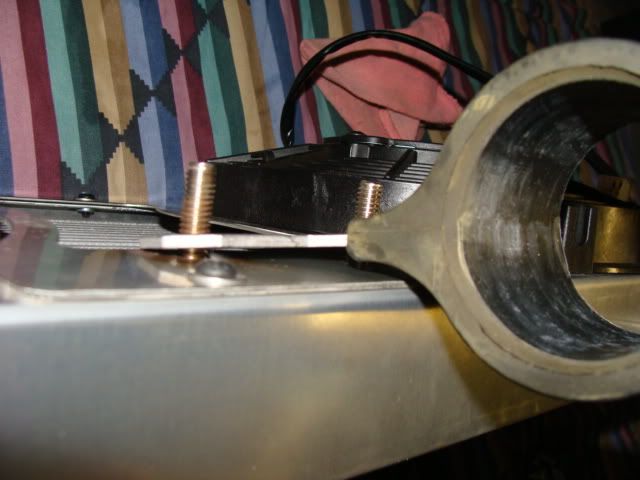
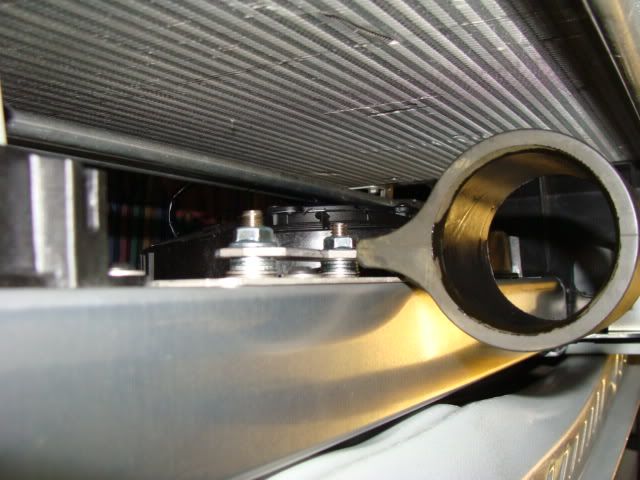
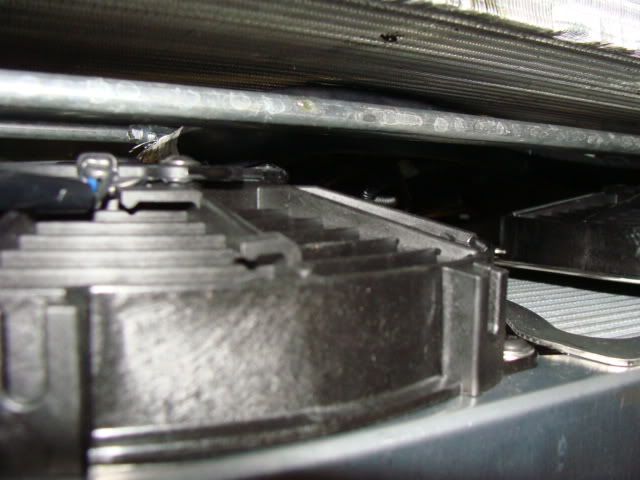
    Fan clearance from under


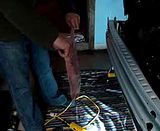
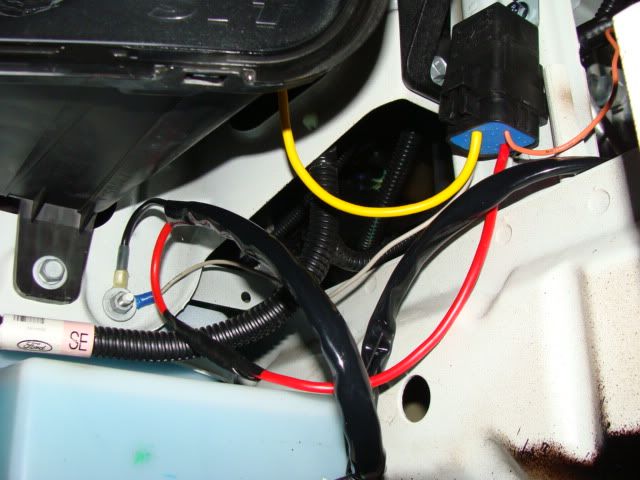
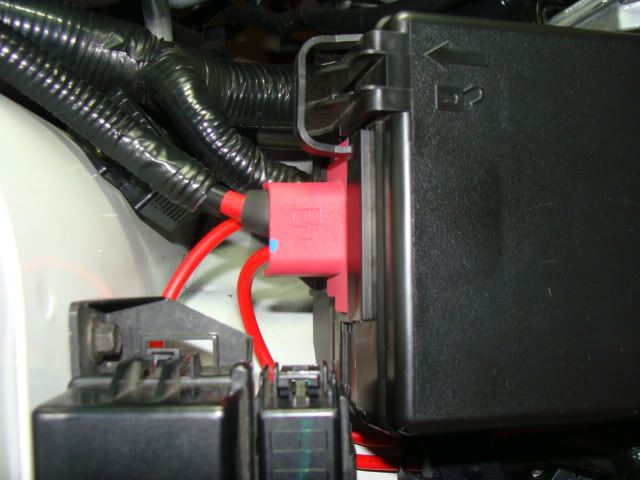
    Wiring was simple. I just feed everything how i wanted. The relay i mounted on the outside of the frame on both sides. The grey and black grounds were mounted together.


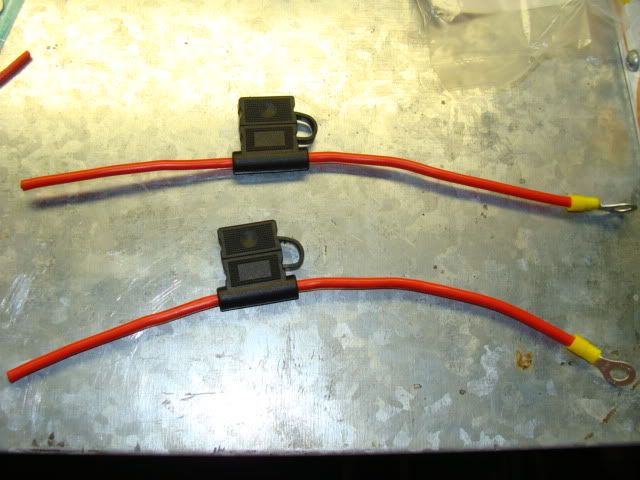
    The fuse assy comes closed looped. I cut the wire leaving a larger amount on one side for a cleaner install to the fuse box. Added a double female 10 gage wire butt connector (not in the kit) to one end, and the supplied larger closed loop connector to the longer end.


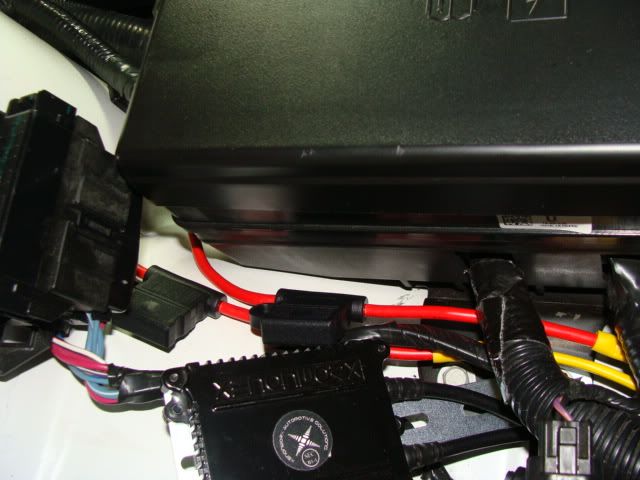
    Made my connection to the hot lead from the fuse box. I had to place both directly under the existing hot lead. I also had to dremmel a little of the inside tab away (the red extended cap) since with the additional wires loops, the height of the bolt changes. This allowed the red cap to sit properly and for the fuse box cover to snap back in perfectly.


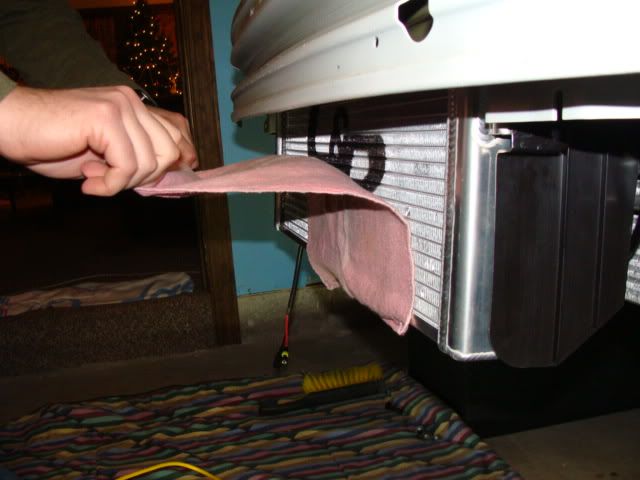
    Then we added the coolant. Checked all lines, connections, etc. Yes, i did change both hoses (from coolant tank to pump, pump to HE). Started the car, and did the rag test.


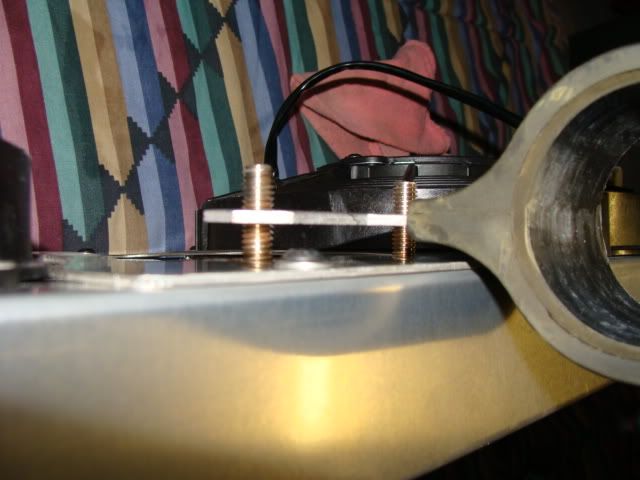
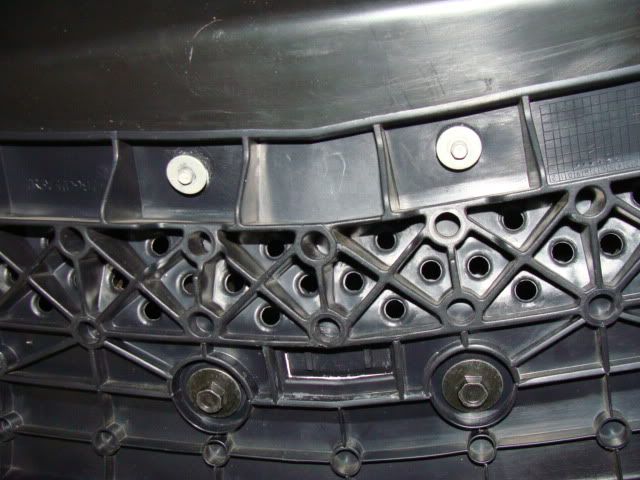
    The two silver bolts under the splitter had to be cut a bit..i think i took about an 1/8" off for them to clear the bottom of the HE, or else they press against when all tightened up.


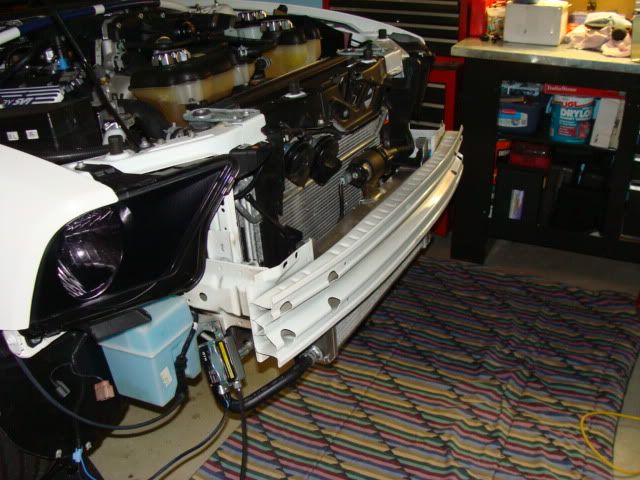
    All done. Worked great. We ran the car for about 20 minutes or so to vent all air and test the fanes. I couldn't believe the force of air being passed through. I couldn't even hear them from inside the car. What an awesome product. And relatively easy to do. Fan clearance wasn't even in question.
    Video of it running below.
    Last edited by Gr8snkbite; 09-19-2010 at 11:41 PM.
    Failure is simply the opportunity to begin again more intelligently....

  2. #2
    Club Member 68fastback's Avatar
    Join Date
    May 2010
    Location
    Paradise!
    Posts
    50,260
    Thanks Thanks Given 
    0
    Thanks Thanks Received 
    0
    Thanked in
    0 Posts

    Re: C&R HE Install

    ....every bit as well-done as the first time, MC!! ;-)

    68fastback™ ;-)

    “When you tear out a man’s tongue you are not proving him a liar, you’re only telling the world that you fear what he might say” -- George R. R. Martin

    MAKE AMERICA GREAT AGAIN, AGAIN! .
    Veritas vos Luberabit
    (the truth will set you free)


  3. #3
    Senior Member
    Join Date
    May 2010
    Posts
    478
    Thanks Thanks Given 
    0
    Thanks Thanks Received 
    0
    Thanked in
    0 Posts

    Re: C&R HE Install

    Nice. I think I'm going to have to bite the bullet next spring and put the rad & HE on the new car as well.

  4. #4
    Birthday Boy Gr8snkbite's Avatar
    Join Date
    Apr 2010
    Posts
    18,694
    Thanks Thanks Given 
    0
    Thanks Thanks Received 
    0
    Thanked in
    0 Posts

    Re: C&R HE Install

    Quote Originally Posted by Tob View Post
    No more photo linky!
    its on my correction list for the evening..sorry...

    Quote Originally Posted by Quagmire View Post
    Nice. I think I'm going to have to bite the bullet next spring and put the rad & HE on the new car as well.
    you wont be disappointed in the least...
    Failure is simply the opportunity to begin again more intelligently....

  5. #5
    Birthday Boy Gr8snkbite's Avatar
    Join Date
    Apr 2010
    Posts
    18,694
    Thanks Thanks Given 
    0
    Thanks Thanks Received 
    0
    Thanked in
    0 Posts

    Re: C&R HE Install

    fixed pics......
    Failure is simply the opportunity to begin again more intelligently....

  6. #6
    Club Member
    Join Date
    May 2010
    Location
    Livermore Ca.
    Posts
    5,748
    Thanks Thanks Given 
    137
    Thanks Thanks Received 
    18
    Thanked in
    15 Posts

    Re: C&R HE Install

    Nice job SA I do have one suggestion on the install. Instead of washers why not just run a nut down the threads like a double nut to sandwich the pump where you want it. At least I think that was the pump that I was looking at.
    I need to do this to my car Mo Money Mo Money.

  7. #7
    Birthday Boy Gr8snkbite's Avatar
    Join Date
    Apr 2010
    Posts
    18,694
    Thanks Thanks Given 
    0
    Thanks Thanks Received 
    0
    Thanked in
    0 Posts

    Re: C&R HE Install

    Quote Originally Posted by The Bone View Post
    Nice job SA I do have one suggestion on the install. Instead of washers why not just run a nut down the threads like a double nut to sandwich the pump where you want it. At least I think that was the pump that I was looking at.
    I need to do this to my car Mo Money Mo Money.
    thanks....i thought about the nut, but figured there wouldnt be enough contact area, so i used washers...
    Failure is simply the opportunity to begin again more intelligently....

  8. #8
    Birthday Boy Gr8snkbite's Avatar
    Join Date
    Apr 2010
    Posts
    18,694
    Thanks Thanks Given 
    0
    Thanks Thanks Received 
    0
    Thanked in
    0 Posts

    Re: C&R HE Install

    Quote Originally Posted by 68fastback View Post
    Ooo, ooo, check out this dude! ...looks like what he calls 'room-temp' is the way to go. He even wrote the book, packages the chemistry and special dyes -- even sells the charger thingy -lol !!
    ---

    Dave, woodworking is so 1990 -- time for anodizing!!

    Great info Dan...but should be in its own thread so as not to get lost in translation so to speak....
    Failure is simply the opportunity to begin again more intelligently....

  9. #9
    Club Member 68fastback's Avatar
    Join Date
    May 2010
    Location
    Paradise!
    Posts
    50,260
    Thanks Thanks Given 
    0
    Thanks Thanks Received 
    0
    Thanked in
    0 Posts

    Re: C&R HE Install

    Quote Originally Posted by Gr8snkbite View Post
    Great info Dan...but should be in its own thread so as not to get lost in translation so to speak....
    Great idea, Keith ...I started another thread ...can you pull posts 6/7/8/9/11 over to here when you get a chance?
    68fastback™ ;-)

    “When you tear out a man’s tongue you are not proving him a liar, you’re only telling the world that you fear what he might say” -- George R. R. Martin

    MAKE AMERICA GREAT AGAIN, AGAIN! .
    Veritas vos Luberabit
    (the truth will set you free)


  10. #10
    Member Spring Lil Cobra's Avatar
    Join Date
    May 2010
    Posts
    113
    Thanks Thanks Given 
    0
    Thanks Thanks Received 
    0
    Thanked in
    0 Posts

    Re: C&R HE Install

    great how to thread. with all that suction, you may be picking up every bug and piece of paper in a 1 block radius. i'd be curious to see your inlet air temperature changes after and before...
    Spring Lil Cobra (SLC)

Thread Information

Users Browsing this Thread

There are currently 1 users browsing this thread. (0 members and 1 guests)

Similar Threads

  1. How To - MGW Shifter Install
    By Birdman in forum 2013-14 GT500
    Replies: 17
    Last Post: 07-18-2012, 10:20 PM
  2. Oil Catch Can Install
    By Cobra Drifter in forum Engine
    Replies: 4
    Last Post: 10-31-2011, 08:21 PM
  3. Fog Light Install
    By Gr8snkbite in forum Exterior Modifications
    Replies: 5
    Last Post: 09-02-2010, 08:27 AM
  4. K.B. 2.8 LC, What a fun install?
    By srk1959 in forum Engine
    Replies: 14
    Last Post: 06-26-2010, 12:14 PM

Posting Permissions

  • You may not post new threads
  • You may not post replies
  • You may not post attachments
  • You may not edit your posts
  •